Smartphones have transformed real estate marketing. You no longer need expensive equipment or professional crews to create property tours that impress buyers. With the right planning, setup, and techniques, your smartphone can produce high-quality videos that showcase properties effectively.
Here’s the process in a nutshell:
- Plan your tour: Define your goals, prepare the property (clean, declutter, maximize light), and create a shot list.
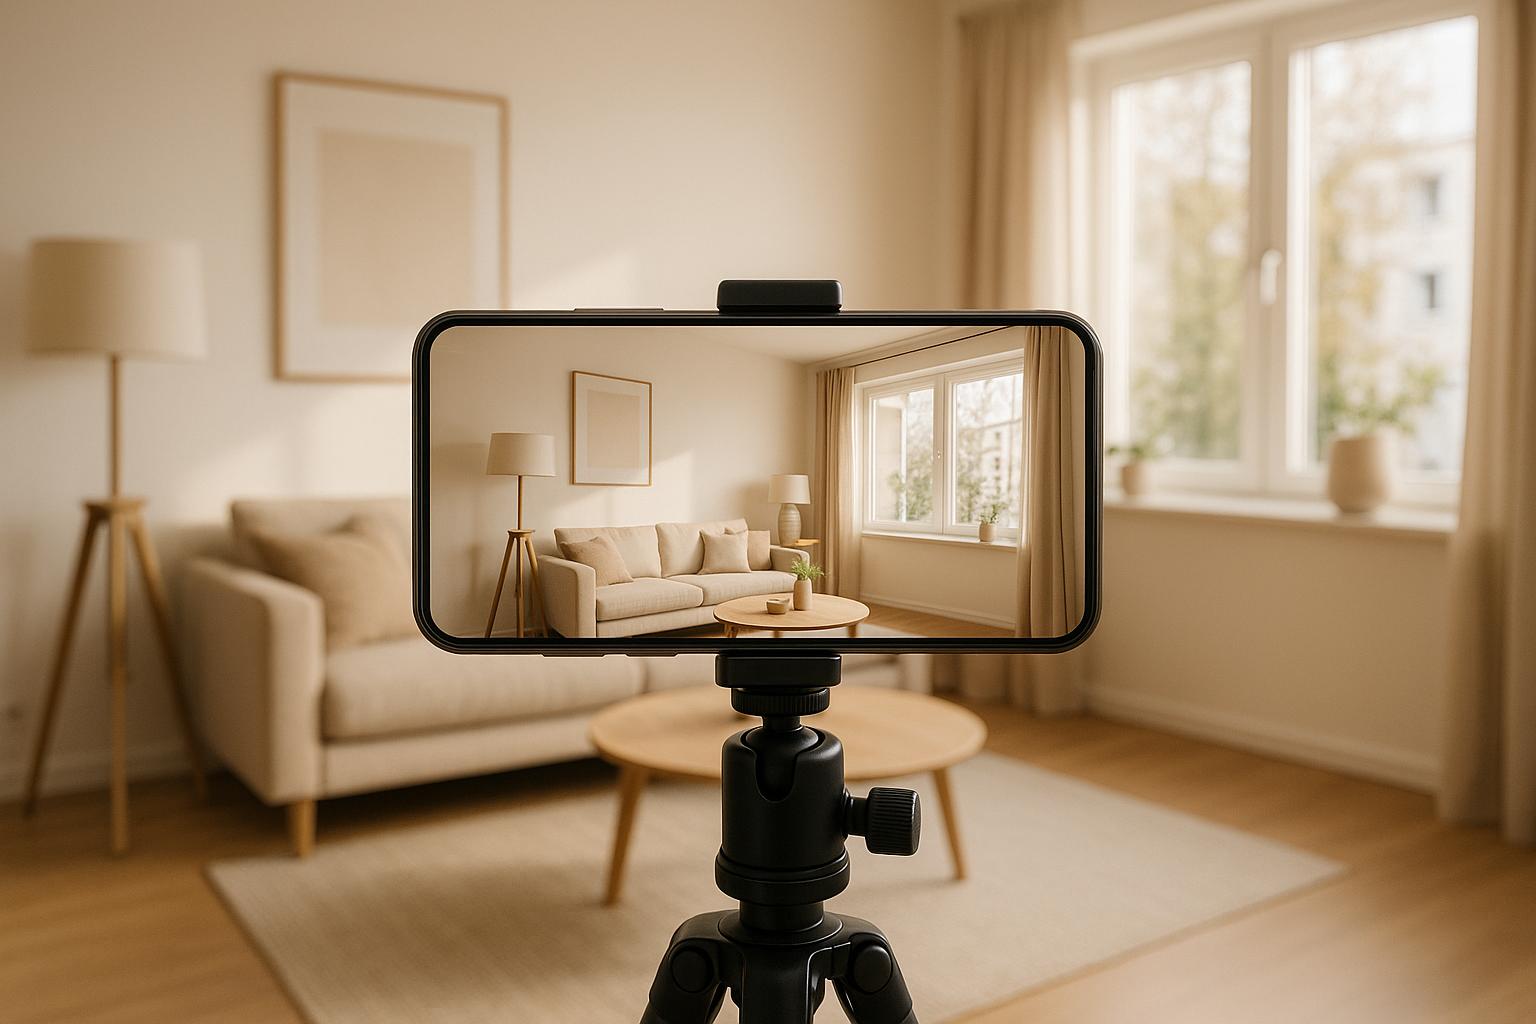
- Set up your phone: Clean the lens, use landscape mode, avoid digital zoom, and keep shots steady with a tripod or stabilizer.
- Film with care: Use smooth movements, include a mix of wide, medium, and close-up shots, and work with natural light for the best results.
- Edit professionally: Trim clips, arrange them logically, add branding, and optimize for different platforms.
- Share strategically: Post teasers on Instagram, full tours on YouTube, and embed videos on property listings for maximum reach.
Smartphones make creating property tours simple, cost-effective, and convenient. By following these steps, you can produce polished videos that grab attention and help sell homes faster.
How To Shoot Real Estate Videos WITH YOUR PHONE | Handheld Property Tour Videos
Planning Your Property Tour
Careful planning is crucial to ensure your property tour captures the right details and resonates with potential buyers. Without proper preparation, your tours might fall short of making a lasting impression.
Set Clear Goals
Every great property tour starts with a clear purpose. What are you trying to achieve? Are you highlighting luxurious features for high-end buyers or showcasing practical layouts for families? Your target audience shapes your approach. For example, young professionals might focus on home offices and proximity to urban areas, while empty nesters may be drawn to spaces designed for entertaining and relaxation.
Define specific, measurable goals to guide your strategy and evaluate its success. Once your objectives are set, ensure the property aligns with the vision you want to present.
Prepare the Property for Filming
Modern smartphones capture every detail, so preparation is key. Start by cleaning and decluttering to create a polished appearance. Pay close attention to reflective surfaces like mirrors, windows, and stainless steel appliances to avoid unwanted glares that can distract viewers.
Remove personal items and excess furniture to help buyers imagine their own belongings in the space. The goal is to strike a balance – making the home feel inviting and spacious, not empty.
Consider using Growth-Realty‘s AI virtual staging to transform bare or outdated spaces into inviting rooms. This tool is especially helpful for vacant properties or those needing a visual refresh, allowing buyers to better imagine the home’s potential.
Maximize natural light by opening all blinds and curtains, and turn on every light in the house – even during the day. This creates a warm and welcoming atmosphere in your footage. Don’t overlook the exterior; sweep walkways, trim overgrown plants, and spruce up the entrance to make a strong first impression.
Create a Shot List
Once your goals are set and the property is ready, plan your shots to tell the story of the space. Without a clear shot list, you might miss essential details.
Cover all the key areas: the front exterior, entryway, living spaces, bedrooms, bathrooms, and kitchen. Include shots that show how rooms flow into one another, using transitions like hallways, doorways, or staircases to help viewers visualize the layout.
Focus on the property’s standout features and capture them from multiple angles. For example, if the kitchen has been recently renovated, include wide shots to show the overall space, medium shots for specific areas, and close-ups of premium finishes.
Timing matters, too. Schedule filming when natural light enhances each room. East-facing spaces look best in the morning, while west-facing rooms shine in the afternoon. Kitchens and living areas often benefit from the soft light of late morning or early afternoon.
Finally, write down your planned sequence before filming to ensure the tour flows logically and covers all important aspects of the property. This preparation will make your final product more engaging and professional.
Smartphone Setup and Equipment
Turn your smartphone into a powerful tool for professional property tours by fine-tuning its settings and adding a few essential accessories. While today’s smartphones are impressively capable, the right setup can transform your footage from basic to polished.
Configure Your Smartphone Settings
Before you start filming, clean your camera lens thoroughly. Even a small smudge or speck of dust can make your footage look blurry or cause distracting lens flares. Use a microfiber cloth, and inspect the lens under good lighting to ensure it’s crystal clear.
Always film in landscape mode. This horizontal orientation allows you to capture more of the room in a single frame, giving viewers a better sense of the space.
Enable the grid feature in your camera settings. This tool helps you align walls, ceilings, and floors, ensuring your shots are straight and visually balanced.
Say no to digital zoom – it reduces image quality and adds graininess to your footage. Instead, simply move closer to your subject for a clearer, sharper shot.
Make use of manual focus and exposure settings. Tap on the area you want to highlight and adjust the brightness to avoid overexposed windows or overly dark corners.
Finally, keep your camera at a consistent height – around 4 to 5 feet (chest level) – to avoid distortion and provide a balanced perspective of the space.
Once your smartphone is set up, take it to the next level with a few must-have filming accessories.
Equipment for Better Filming
To boost the quality of your property tour videos, consider adding some basic accessories to your smartphone setup. A tripod or stabilizer is a game-changer. It keeps your footage steady and ensures consistent framing, which is particularly important in low-light conditions.
For moving shots, a smartphone stabilizer like a gimbal can help you achieve smooth, professional-looking footage, even while walking through a property.
These simple adjustments and tools can elevate your video quality, making your property tours look polished and professional.
Filming Techniques for Property Tours
Learn how to create polished and professional property tours using just your smartphone. These techniques will help you capture footage that stands out.
Use Smooth Camera Movements
Shaky footage can make even the best property look unprofessional. To avoid this, try the "ninja walk" technique: bend your knees slightly, walk slowly, and hold your phone firmly at chest level with both hands. Keep your elbows tucked in and the phone pressed against your body for added stability. This controlled movement helps reduce shake significantly.
If you’re moving through the property, consider using a monopod. The added weight helps dampen minor vibrations, resulting in smoother walking shots.
Finally, don’t stick to just one type of shot. Mixing up your approach adds depth and keeps viewers engaged.
Film Different Types of Shots
A variety of shots ensures your property tour feels dynamic and provides a complete view of the space. Here are some key shot types to include:
- Wide-angle shots: Use your phone’s wide-angle lens to capture entire rooms, showcasing layouts and adding depth with foreground elements like furniture or doorways.
- Medium shots: Adjust your position by stepping closer or farther from your subject to frame the perfect medium shot without compromising image quality.
- Close-up shots: Highlight unique architectural details or finishes using optical zoom for crisp, detailed visuals.
- Panorama shots: Use panorama mode to capture large spaces, such as expansive living rooms or stunning exterior views.
Switch up your angles and even film from different heights to keep the visuals fresh and engaging.
Work with Available Lighting
Lighting can make or break your video. Natural light is your best friend, so aim to film during times like the golden hour for soft, flattering illumination. Open all curtains and blinds to flood the space with light, creating a welcoming atmosphere.
For areas with limited natural light, portable LED lights or softboxes can help. Position these lights to bounce off neutral-colored walls or ceilings for a softer, more natural look. If you’re filming larger spaces, use multiple light sources to avoid uneven lighting or harsh shadows.
Consistency is key – maintain the same lighting style throughout your tour to ensure the footage flows seamlessly from room to room.
sbb-itb-2f9da9d
Editing Your Property Tour Video
With your footage in hand, the editing process is where your property tour takes shape. This step transforms raw clips into a polished video that grabs attention and keeps potential buyers engaged. Thanks to modern smartphone editing apps, you can achieve professional results without needing expensive software or advanced skills.
Cut and Organize Your Footage
Start by reviewing all your recorded clips. Trim out shaky parts, awkward pauses, or unnecessary segments. Keep your video concise – aim for a runtime of 2-4 minutes to hold viewers’ attention.
Arrange the clips in a sequence that feels natural, mimicking how someone would explore the property in person. Begin with the exterior and entryway, then move through the key interior spaces and highlight standout features. For each area, keep shots brief – around 8-12 seconds per clip, or 15-20 seconds for larger rooms.
Pay special attention to transitions between rooms. Smooth cuts, especially through doorways or hallways, help maintain visual flow and make the tour feel seamless. If you’ve captured multiple angles of the same space, pick the clearest and most dynamic shot to keep the pacing sharp.
Add Branding and Finishing Touches
To elevate your video, add subtle branding and enhancements. Incorporate background music that’s upbeat yet unobtrusive, keeping the volume low enough so any narration or natural sounds remain clear.
Place a semi-transparent logo in the corner of the video – it should be visible but not distracting. Use text overlays to highlight key features like "Granite Countertops" or "Spacious Walk-In Closet." Keep the text brief and position it carefully to avoid covering important visuals.
Lighting consistency is crucial for a professional look. Use color correction tools to adjust brightness, contrast, and saturation, ensuring all clips have a cohesive appearance, even if lighting varied during filming.
For an extra time-saving boost, consider tools like Growth-Realty’s AI-powered editing solutions. These tools can automatically enhance footage, apply branding elements, and save you hours of manual work.
Add relevant property details as text overlays during appropriate scenes. For example, display square footage when showing room layouts or note recent upgrades while showcasing remodeled kitchens or bathrooms. These touches provide context and help viewers connect with the space.
Once your video is polished and branded, it’s time to prepare it for different platforms.
Export for Different Platforms
Each platform has its own requirements for video dimensions and formats, so exporting correctly is key to maximizing your video’s impact:
- Instagram: Use 9:16 aspect ratio (1080×1920, MP4).
- YouTube: Export in 16:9 (1920×1080 or 3840×2160, MP4).
- Property listing websites: Stick with 16:9 MP4 or MOV files, and check platform-specific size limits.
To ensure high-quality visuals, use a bitrate of at least 10 Mbps for Full HD and 35 Mbps for 4K. This level of detail is essential when showcasing property features that influence buying decisions.
For email campaigns, prioritize smaller file sizes. Export videos in 720p resolution (1280×720) and keep the file size under 25 MB for compatibility with most email clients. If your video is too large, upload it to a hosting platform and include a clickable thumbnail with a play button overlay in your email.
Tailor your video to different marketing channels by creating multiple versions. A 60-second teaser works perfectly for social media, while a 3-4 minute full tour is ideal for property listings or email campaigns. This strategy helps you reach a broader audience across various platforms.
To save time on future projects, set up export presets in your editing app for each platform. Once these are configured, you’ll streamline your workflow and make editing future property tours quicker and easier.
Sharing Your Property Tour
Now that your property tour video is edited and ready to go, it’s time to get it in front of the right audience. Distributing your video strategically across multiple platforms and using smart tools can transform it into a powerful lead magnet.
Share Across Multiple Channels
To maximize reach, adapt your video content for different platforms. On Instagram, post a short teaser as a Reel during peak hours. Use a mix of location-specific hashtags like #ChicagoRealEstate or #MiamiHomes alongside broader ones such as #PropertyTour and #HomeBuying to connect with local buyers and a wider audience.
For Facebook, longer videos work well. Upload the full 3–4 minute tour directly to the platform for better engagement, as native video posts tend to perform better. Write a caption that highlights key selling points, such as standout features and the price, and share it in local real estate groups or community pages to reach more potential buyers.
YouTube is an excellent place for long-term visibility. Create an eye-catching thumbnail that highlights the property’s best features, and make sure the video description includes essential details like the address, square footage, price, and your contact information. Optimizing the video with relevant keywords can help it continue to attract leads over time.
Don’t forget about real estate listing sites like Zillow, Realtor.com, or your local MLS. Embedding your video directly into the property listing can boost engagement. Also, feature it prominently on your agency’s website – either on a dedicated property page or in a "Virtual Tours" section.
By tailoring your approach to each platform, you’ll ensure your property tour gets noticed by an engaged audience.
Use Marketing Automation Tools
Beyond simply posting your video, automation tools can help you reach buyers more effectively. A good CRM system can segment your audience and automatically share the video with potential buyers who are interested in similar properties, neighborhoods, or price ranges.
Email campaigns are another effective way to keep leads engaged. Create a custom email template featuring a clickable thumbnail of your property tour. A compelling subject line – like "Stunning 4BR Colonial in Westfield – Virtual Tour Inside" – can boost open rates and draw attention to the listing.
You can even use WhatsApp chatbots to share your tour automatically when prospects inquire about a property. For example, Growth-Realty’s AI-powered system targets interested buyers with personalized messages and links to property videos.
Add Interactive Features
Take your property tour to the next level by adding interactive elements. Pair your video with a 360-degree virtual tour, allowing buyers to explore the property at their own pace. This added layer of engagement can make your listing stand out.
Finally, keep an eye on analytics like views, watch time, and engagement rates. These insights will help you refine your distribution strategy and ensure your property tour remains a dynamic and effective marketing tool.
Conclusion: Making Professional Property Tours with Smartphones
Creating property tours with a smartphone has become a must-have skill for real estate agents. Why? Because virtual tours aren’t just a nice touch anymore – they’re what buyers expect. In fact, 67% of home buyers want to see a virtual tour before deciding on a property, and homes with virtual tours tend to close 31% faster than those without them. Even better, listings with 3D tours can sell for up to 9% more on average.
With the right techniques, your smartphone can deliver results that rival expensive professional equipment. Virtual tours have shifted from being an optional perk to an essential part of meeting client expectations. By following smart planning and filming strategies, you can keep costs low while delivering exactly what buyers are looking for.
But it’s not just about creating the tour – it’s also about how you share it. Listings with virtual tours get 87% more views, and potential buyers spend five to ten times longer on websites that feature these tours. That extra attention can mean more serious inquiries and quicker sales.
To make the most of your efforts, distribute your tours widely. Post them on Instagram Reels, YouTube, and your MLS listings to boost visibility. Pairing your smartphone-filmed tours with smart distribution and automation strategies ensures you’re maximizing your reach and impact.
Today’s smartphones, combined with effective filming and editing techniques, give you the tools to create captivating tours that deliver real results. Whether you’re targeting tech-savvy Gen Z buyers – who are 130% more likely to schedule a showing when a property includes a virtual tour – or other demographics, these tours are now a vital part of modern real estate marketing.
Put these techniques into action for your next listing and watch your marketing efforts take off. At Growth-Realty, we’re here to help you use cutting-edge strategies to showcase properties and connect with the right buyers. Let’s make your next listing stand out.
FAQs
What mistakes should I avoid when filming property tours on a smartphone?
How to Avoid Common Mistakes When Filming Property Tours with Your Smartphone
Creating professional and engaging property tours with your smartphone is easier than you think – if you steer clear of a few common missteps. Here’s what to watch out for:
- Poor lighting: Dim or uneven lighting can make a property feel uninviting and obscure important details. Make the most of natural light by shooting during the day, or use extra lighting tools to brighten up darker areas.
- Shaky footage: Unsteady shots can distract viewers and make your video look amateurish. A tripod or gimbal can make all the difference, ensuring smooth and stable footage.
- Overusing zoom: Zooming in too much can ruin video quality and make the visuals look distorted. Instead, physically move closer to highlight key features and capture the details clearly.
- Lack of planning: Wandering aimlessly with your camera can result in a chaotic and unprofessional video. Take time to plan your route and create a shot list to showcase the property’s best features in an organized way.
Avoiding these mistakes will help you produce polished, engaging property tours that leave a great impression on potential buyers or renters.
What are the best tips for making my property tour videos stand out on social media?
To make your property tour videos pop on social media, start with crisp visuals. Bright, natural lighting and clear audio are key. Even a smartphone with a decent camera can do the trick – just add a microphone or stabilizer for a more polished look.
Focus on more than just the property itself. Highlight the lifestyle and community benefits to help viewers picture themselves living there. Keep your videos short and engaging – platforms like Instagram and TikTok favor bite-sized content. Use creative angles to showcase unique features of the home, and weave in storytelling to create an emotional connection with your audience.
Don’t forget the finishing touches: attention-grabbing captions, trending music, and consistent posting during high-traffic times can boost visibility and shares. These small details can turn your videos into content that sticks with potential buyers.
What are the best tips for editing property tour videos shot on smartphones to keep viewers interested?
When editing property tour videos shot on smartphones, the goal is to keep viewers interested while presenting the home in the best possible light. Start by emphasizing the property’s standout features and ensuring the video flows smoothly. Subtle transitions work wonders here – steer clear of harsh cuts that could disrupt the viewing experience. Adding captions or text overlays is another great way to spotlight key details and guide your audience’s focus.
Consistency in lighting is crucial, so adjust clips to maintain a uniform look, and cut out any footage that feels unnecessary or distracting. To make the video more engaging, sprinkle in dynamic elements like pans, zoom-ins, or even time-lapse shots. These simple techniques can add a polished touch, helping the property grab attention and encouraging viewers to stick around until the very end.

